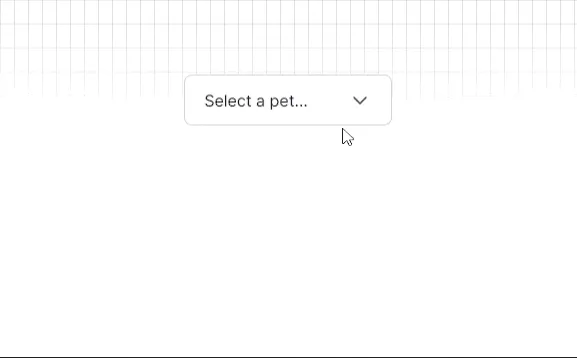
¡Hola! ✨ Hoy quiero compartir contigo un dropdown personalizado y completamente accesible que he desarrollado. Este componente no utiliza las etiquetas HTML estándar para dropdowns, pero sigue siendo totalmente accesible 😊.
Código del Dropdown
Aquí tienes todo el código necesario para implementar este dropdown en tu proyecto. He incluido los archivos HTML, CSS y JavaScript para que puedas integrarlo fácilmente.
Estructura del proyecto
├── css│ ├── index.css│ └── reset.css├── js│ └── index.js└── index.htmlCódigo HTML 🧱
Primero, crearemos la estructura HTML de nuestro dropdown.
<!DOCTYPE html><html lang="en"> <head> <meta charset="UTF-8" /> <meta name="viewport" content="width=device-width, initial-scale=1.0" /> <link rel="preconnect" href="https://fonts.googleapis.com" /> <link rel="preconnect" href="https://fonts.gstatic.com" crossorigin /> <link href="https://fonts.googleapis.com/css2?family=Inter:wght@100..900&display=swap" rel="stylesheet" /> <link rel="stylesheet" href="./css/reset.css" /> <link rel="stylesheet" href="./css/style.css" /> <title>Dropdown ✨</title> </head> <body> <main class="main"> <div class="main__dropdown dropdown"> <button class="dropdown__item" aria-haspopup="listbox" aria-expanded="false" aria-controls="dropdown__menu" > <span class="dropdown__item-input" id="dropdown__item-input"> Select a pet... </span> <svg xmlns="http://www.w3.org/2000/svg" aria-hidden="true" class="dropdown__item-icon" width="24" height="24" viewBox="0 0 24 24" stroke-width="1.5" stroke="currentColor" fill="none" stroke-linecap="round" stroke-linejoin="round" > <path stroke="none" d="M0 0h24v24H0z" fill="none" /> <path d="M6 9l6 6l6 -6" /> </svg> </button> <ul class="dropdown__menu menu" id="dropdown__menu" role="listbox" aria-labelledby="dropdown__item-input" > <li class="menu__item" role="option" tabindex="0" data-value="Fish"> Fish 🐠 </li> <li class="menu__item" role="option" tabindex="0" data-value="Cat"> Cat 😺 </li> <li class="menu__item" role="option" tabindex="0" data-value="Dog"> Dog 🐶 </li> <li class="menu__item" role="option" tabindex="0" data-value="Cow"> Cow 🐮 </li> <li class="menu__item" role="option" tabindex="0" data-value="Bird"> Bird 🐦 </li> </ul> </div> </main> <div class="background-overlay"></div> <script src="./js/script.js"></script> </body></html>Código CSS 🎨
Primero, escribimos el archivo reset.css para asegurarnos de que nuestro diseño no se vea afectado por los estilos predeterminados del navegador.
*,*::before,*::after {  margin: 0;  padding: 0;  border: 0;  box-sizing: border-box;  vertical-align: baseline;}
*::before,*::after {  display: block;}
img,picture,video,iframe,figure {  max-width: 100%;  width: 100%;  display: block;  object-fit: cover;  object-position: center center;}
a {  display: block;  text-decoration: none;  color: inherit;  font-size: inherit;}
p a {  display: inline;}
li {  list-style-type: none;}
html {  scroll-behavior: smooth;}
h1,h2,h3,h4,h5,h6,p,span,a,strong,blockquote,i,b,u,em {  font-size: inherit;  font-weight: inherit;  font-style: inherit;  text-decoration: none;  color: inherit;}
blockquote::before,blockquote::after,q::before,q::after {  content: '';  content: none;}
form,input,textarea,select,button,label {  font-family: inherit;  font-size: inherit;  hyphens: auto;  background-color: transparent;  color: inherit;  display: block;  appearance: none;  outline: none;}
table,tr,td {  border-collapse: collapse;  border-spacing: 0;}
svg {  width: 100%;  display: block;}
body {  min-height: 100vh;  font-size: 100%;  font-family: 'Inter', sans-serif;  color: #393939;  hyphens: auto;  font-smooth: always;  -webkit-font-smoothing: antialiased;  -moz-osx-font-smoothing: grayscale;}
#root {  max-width: 1400px;  margin: 0 auto;}
Luego, agregamos el estilo específico para el dropdown en index.css.
.background-overlay {  position: fixed;  bottom: 0;  left: 0;  right: 0;  top: 0;  z-index: -1;  background: linear-gradient(to right, #4f4f4f2e 1px, transparent 1px),    linear-gradient(to bottom, #4f4f4f2e 1px, transparent 1px);  background-size: 14px 24px;  mask-image: radial-gradient(ellipse 80% 50% at 50% 0%, #000 70%, transparent 110%);}
.main {  min-height: 100vh;  display: grid;  place-content: center;}
.main__dropdown {  position: relative;}
.dropdown__item {  min-width: 13rem;  position: relative;  z-index: 20;  background-color: #ffffff;  border: 1px solid #D4D4D4;  border-radius: .5rem;  padding: .8rem 1.2rem;  cursor: pointer;  display: grid;  grid-auto-flow: column;  align-items: center;  justify-content: space-between;  gap: 1rem;  transition: transform .3s ease, opacity .3s ease;}
.dropdown__item-input {  color: #0A0A0A;}
.dropdown__item-icon {  transition: transform .3s ease;}
.dropdown__menu {  position: absolute;  left: 0;  z-index: 10;  top: calc(100% + .5rem);  width: 100%;  max-height: 15rem;  overflow-y: auto;  background-color: #ffffff;  border: 1px solid #D4D4D4;  border-radius: .5rem;  padding: .5rem .6rem;  box-shadow: 0px 4px 15px rgba(115, 115, 115, 0.15);  visibility: hidden;}
.menu__item {  position: relative;  padding: .5rem .6rem;  cursor: pointer;  border-radius: .4rem;  z-index: 10;  overflow: hidden;  transition: opacity .3s ease;}
.dropdown__item:active {  transform: scale(0.95);}
.menu__item:hover {  opacity: 0.6;}
.dropdown__menu::-webkit-scrollbar {  width: .4rem;}
.dropdown__menu::-webkit-scrollbar-thumb {  background-color: #D4D4D4;  border-radius: .4rem;}
.dropdown__menu::-webkit-scrollbar-track {  background-color: transparent;}
.dropdown__item--active {  transform: scale(0.9);  opacity: 0.7;}
.dropdown__item-icon--active {  transform: rotate(-180deg);}
.menu__item--active {  color: #ffffff;  font-weight: 500;  background-color: #0A0A0A;}
.dropdown__menu--active {  visibility: visible;  animation: fade_in .3s cubic-bezier(0.42, 0, 0.58, 1);}
@keyframes fade_in {  0% {    opacity: 0;    transform: translateY(-90px);  }  50% {    opacity: 0.5;    transform: translateY(10px);  }  70% {    opacity: 0.7;    transform: translateY(-5px);  }  100% {    opacity: 1;    transform: translateY(0);  }}
Código JavaScript ⚡
Finalmente, agregamos la funcionalidad del dropdown con JavaScript.
const menuItems = document.querySelectorAll(".menu__item");const dropdownItem = document.querySelector(".dropdown__item");const dropdownMenu = document.querySelector(".dropdown__menu");const dropdownItemIcon = document.querySelector(".dropdown__item-icon");const dropdownItemInput = document.querySelector(".dropdown__item-input");
dropdownItem.addEventListener("click", () => {  dropdownItem.classList.toggle("dropdown__item--active");  dropdownMenu.classList.toggle("dropdown__menu--active");  dropdownItemIcon.classList.toggle("dropdown__item-icon--active");});
menuItems.forEach((menuItem) => {  menuItem.addEventListener("click", (e) => {    dropdownItem.classList.remove("dropdown__item--active");    dropdownMenu.classList.remove("dropdown__menu--active");    dropdownItemIcon.classList.remove("dropdown__item-icon--active");
    dropdownItemInput.dataset.value = e.target.dataset.value;    dropdownItemInput.innerHTML = e.target.innerHTML;
    menuItems.forEach((item) => {      item.classList.remove("menu__item--active");
      if (item.dataset.value === dropdownItemInput.dataset.value) {        item.classList.add("menu__item--active");      }    });  });});
Puedes copiar y pegar el código en tu proyecto para probarlo. Espero que te guste y lo mas importante que te sea útil 😊.
Happy coding 👻

